How to use Dr Pen M8
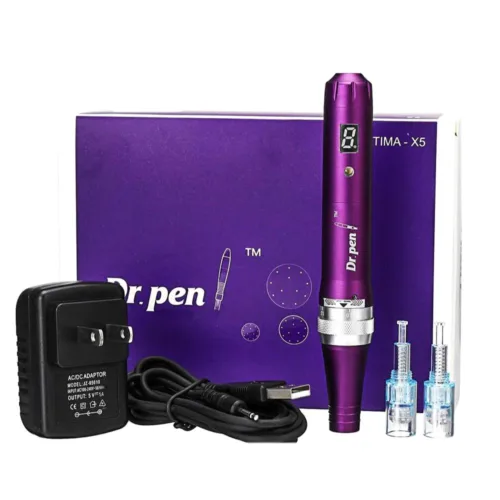
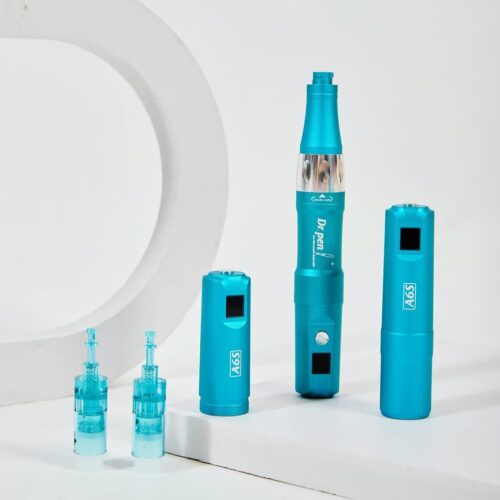
The Dr Pen M8 is a microneedling pen designed to create controlled micro-punctures in the skin using disposable needle cartridges. This microneedling guide explains how to prepare the device, choose conservative settings, move the pen correctly, and care for your skin afterward. Microneedling can carry risks, so use this as general education, read your device manual, and consider seeing a trained professional for deeper treatments or scar work. (fda.gov)
Is the Dr Pen M8 safe to use at home?
The safest answer is: it depends on your skin, your training, the depth used, and how carefully you follow hygiene and aftercare. The FDA notes that microneedling devices can cause effects such as redness, discomfort, bleeding, bruising, pigmentation changes, infection, and other complications, and it recommends talking with a health care provider about benefits and risks before treatment. Do not treat microneedling like a casual skincare step; treat it like a controlled procedure that requires sterile supplies, clean technique, and patience. (fda.gov)
The Dr Pen M8 has adjustable needle depth from 0 to 2.5 mm and 6 speed levels, but “adjustable” does not mean every depth is appropriate for every user or every area. Deeper settings increase the need for professional judgment, especially around acne scars, stretch marks, sensitive skin, darker skin tones, or medical conditions. If you are new, stay conservative and do not use the pen on active acne, irritated skin, rashes, wounds, cold sores, or areas you cannot keep clean.

Gather everything before you start
Good microneedling techniques begin before the pen touches your skin. The goal is to avoid stopping mid-treatment to search for serum, adjust lighting, or touch non-sterile surfaces. Dr Pen instructions commonly recommend a clean towel, alcohol solution, cotton pads, a new cartridge, optional gloves, optional numbing cream, and a hydrating slip serum such as hyaluronic acid.
Prepare this simple setup:
- Dr Pen M8 device, charged or plugged in.
- Brand-new, sterile, compatible cartridge.
- Clean towel or disposable surface cover.
- Gentle cleanser for double cleansing.
- Alcohol wipes or alcohol solution for surface and device sanitation.
- Sterile or clean hyaluronic acid serum for glide.
- Disposable gloves if you want an extra hygiene barrier.
- Mirror, good lighting, and a hair tie or headband.
- Gentle moisturizer and high-protection sunscreen for aftercare.
Avoid using vitamin C, retinol, exfoliating acids, brightening actives, fragrance-heavy products, or makeup during the procedure. These can sting or irritate freshly treated skin, and microneedling devices are not approved for delivering cosmetics, topical medications, vitamin solutions, or similar products into the skin. (fda.gov)
Follow these Dr Pen M8 steps
- Prepare your skin and workspace. Wash your hands, tie back your hair, and cleanse your skin twice to remove makeup, sunscreen, oil, and residue. Wipe down the surface where you will place your supplies, then keep everything you need within reach. If you touch a phone, faucet, serum bottle, or drawer handle once you begin, clean your hands again before returning to your face.
- Inspect and attach a new cartridge. Open one new cartridge only when you are ready to begin, and never touch the needle tips. Insert it into the Dr Pen M8 and lock it into place according to your manual. Do not reuse a microneedling cartridge, even on yourself, because cartridge reuse is considered unsafe and can transfer infectious agents. (fda.gov)
- Set a conservative needle depth. Turn the adjustment ring to choose the needle depth. For beginners, the practical goal is not to chase dramatic redness or bleeding; it is to learn control, pressure, and skin response. Use shallower settings for delicate or bony areas and reserve deeper work for trained professionals or provider-guided treatment plans.
- Apply hyaluronic acid for slip. Spread a thin layer of hyaluronic acid serum over one small treatment zone. This helps the pen glide instead of dragging or skipping. Work in sections rather than coating the entire face at once, because serum can dry down before you reach the next area.
- Power on and choose your speed. The Dr Pen M8 offers 6 speed levels, so start lower while you learn how the device feels and moves. A faster setting is not automatically better; your priority is even contact, light pressure, and controlled passes. If the pen catches, drags, or feels difficult to steer, pause and add more slip serum.
- Move in a controlled grid pattern. Hold the skin gently taut with your free hand. Glide the pen in short, even passes over a small area, moving vertically, horizontally, and diagonally as tolerated. Dr Pen’s guide recommends working in a grid so you can track where you have already passed and avoid repeatedly overworking the same spot.
- Use light pressure and keep the pen moving. Let the motorized needles do the work. Pressing hard can increase irritation and make the movement uneven. If you see excessive bleeding, feel sharp pain, or notice swelling beyond mild treatment redness, stop the session and do not continue to “push through.”
- Treat one zone at a time. Common facial zones include forehead, cheeks, chin, and jawline, but avoid the eyelids, lips, nostrils, and any broken or inflamed skin. Reapply slip serum before each zone. Keep passes brief and consistent rather than repeatedly circling areas that already look flushed.
- Turn off the device and discard the cartridge. When finished, switch off the M8 before removing the cartridge. Dispose of the cartridge safely so no one is pricked by the needles. Wipe the device exterior according to the manual, keeping liquid away from openings and electrical components.
- Calm and protect the skin. Apply a simple hydrating serum or gentle moisturizer. If you need to rinse, use tepid water rather than hot water. Expect temporary redness, tightness, dryness, or mild pinpoint bleeding, but seek medical advice promptly for worsening pain, spreading redness, pus, fever, unusual swelling, or signs of infection. (fda.gov)
Use proper microneedling techniques for even coverage
Technique matters more than speed. The most common beginner mistake is treating microneedling like exfoliation and scrubbing back and forth until the skin looks intensely red. A better approach is slow, mapped, and minimal: complete a few organized passes, then move on.
Use these handling cues:
- Keep the pen perpendicular to the skin so the cartridge lands evenly.
- Hold skin taut, especially around cheeks and jawline.
- Work in small sections about the size of a cheek area or smaller.
- Add serum whenever the pen stops gliding smoothly.
- Avoid overlapping too many passes on thin or sensitive areas.
- Stop if discomfort suddenly increases or the skin looks abraded.
When reading dr pen reviews, remember that another person’s depth, frequency, pressure, and skin response may not apply to you. Reviews can help you understand ease of use or cartridge fit, but they should not replace professional guidance. Your skin’s reaction during and after the session is more important than someone else’s routine.

How often should you use the Dr Pen M8?
Do not microneedle daily or weekly with real needle penetration. Dr Pen US states that microneedling should be performed once every 4 to 6 weeks in its professional protocol, while another Dr Pen product page references 2 to 4 weeks depending on depth and healing; the more conservative schedule is usually the safer starting point for at-home users.
Frequency should be based on full recovery, not impatience. If your skin is still dry, flaky, tender, inflamed, or unusually reactive, wait longer. Microneedling benefits are tied to the skin’s repair process, and repeating treatment too soon can increase irritation rather than improve results.
Follow aftercare for the next week
The first 24 to 48 hours are about calming the skin and avoiding unnecessary irritation. Dr Pen’s aftercare guidance recommends avoiding sweating, exercise, makeup, harsh actives, scrubs, acids, toners, and prolonged sun exposure shortly after treatment, while focusing on hydration, moisturizer, and sunscreen.
Use this aftercare checklist:
- First day: keep skincare simple with hydration and moisturizer only.
- For 24 hours: avoid makeup, heavy sweating, swimming, and hot environments.
- For several days: skip retinoids, exfoliating acids, vitamin C, scrubs, and fragranced products.
- Every morning: apply high-protection sunscreen if you go outdoors.
- During recovery: do not pick flakes or scrub tight skin.
- After about a week: return to regular products only if your skin feels normal.
If you develop severe burning, spreading redness, rash, blistering, pus, fever, or pigmentation changes, stop home treatment and contact a qualified health professional. A good microneedling routine is not only about the session itself; it is about knowing when not to continue.
Build results slowly and safely
How to use Dr Pen M8 correctly comes down to preparation, sterile single-use cartridges, conservative settings, gentle passes, and disciplined aftercare. The device’s adjustable depth and speed give flexibility, but your best results come from restraint and consistency rather than aggressive treatment. Use this microneedling guide as a starting point, follow the official dr pen instructions that came with your device, and choose professional care whenever your goal involves deeper scars, medical skin concerns, or uncertainty about safe technique.